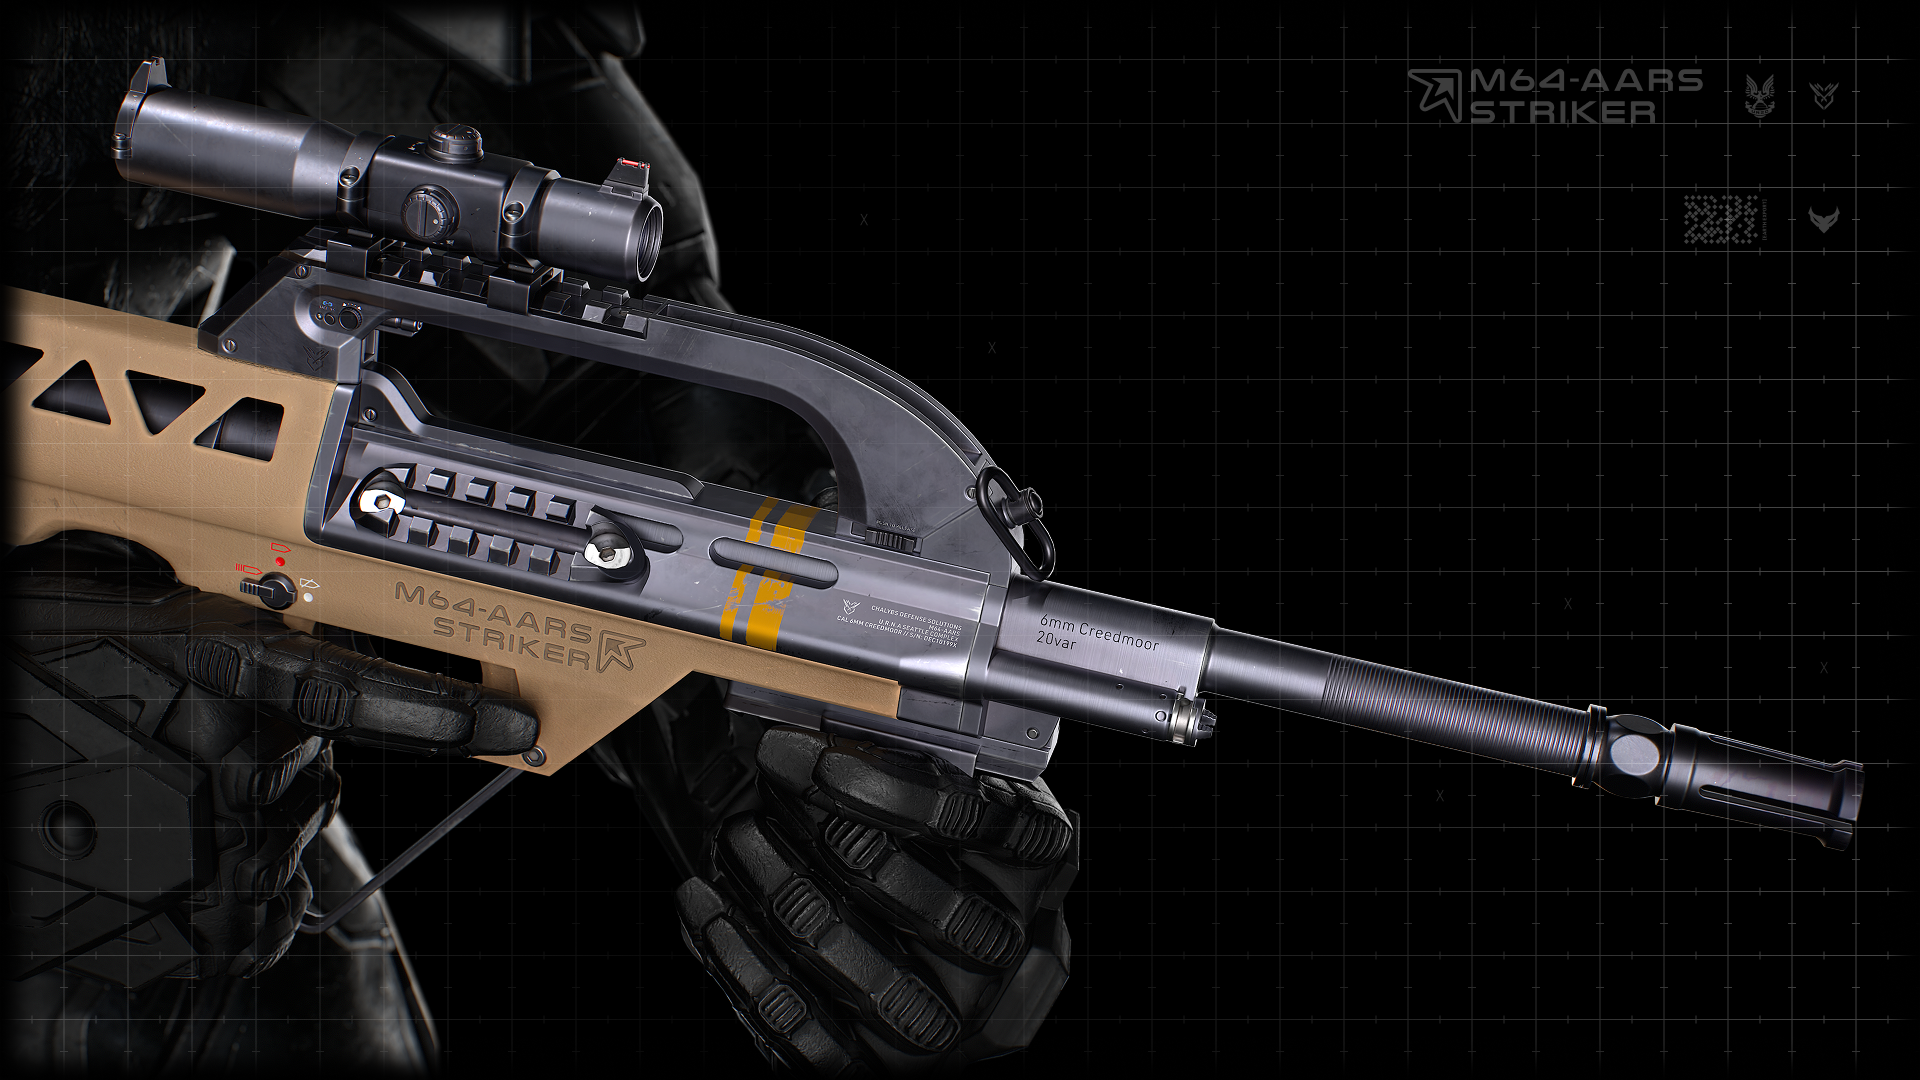
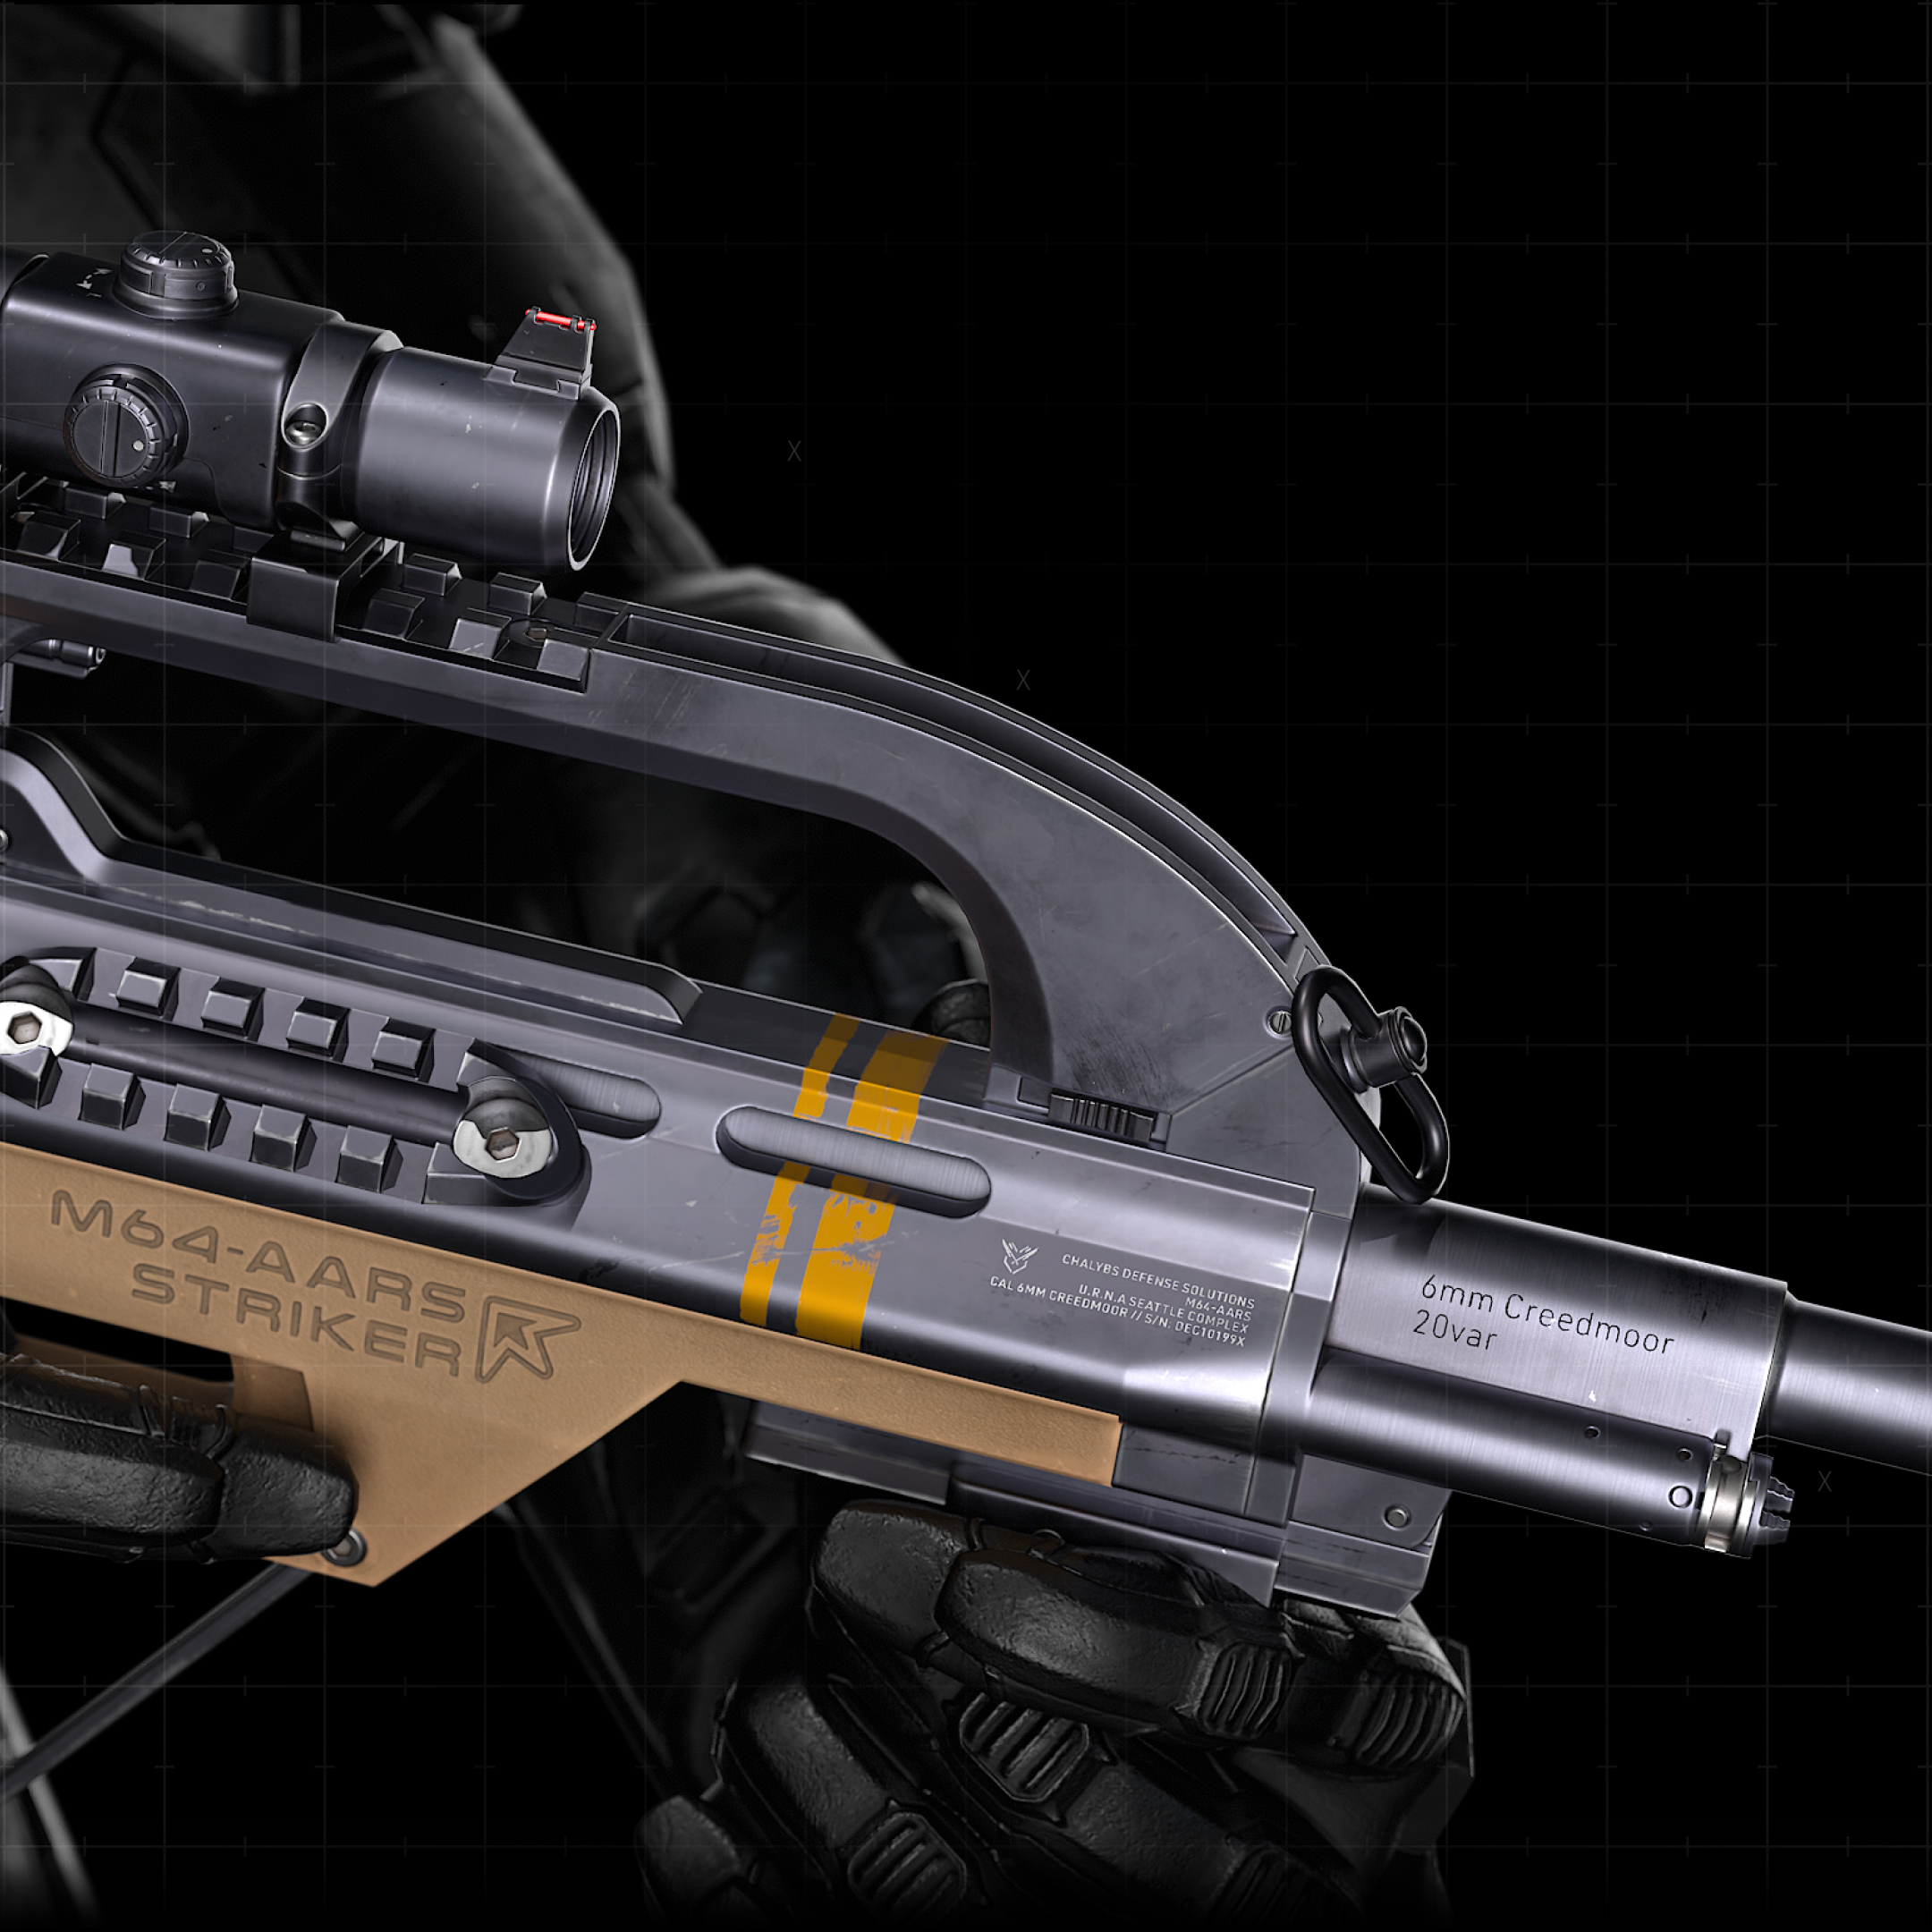
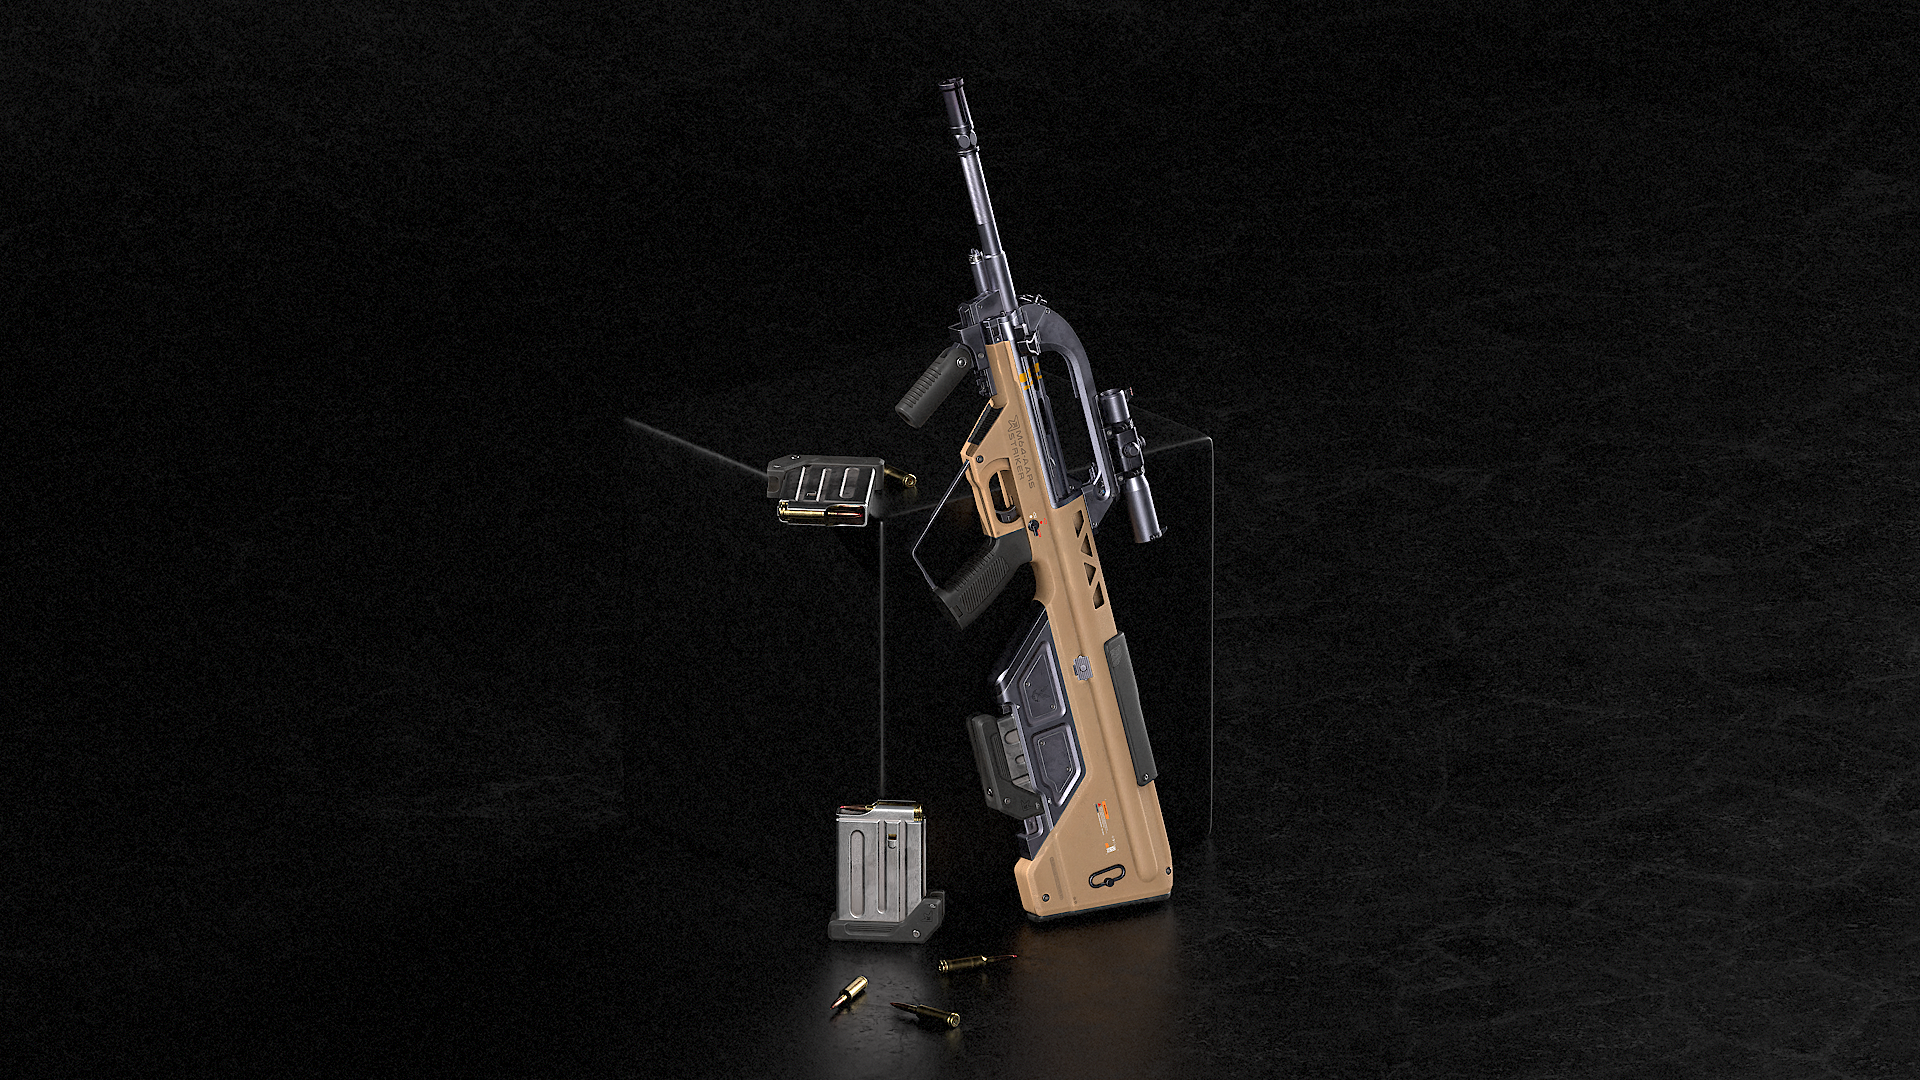
Presenting the M64-AARS "STRIKER".
A "Halofied" AUG inspired by Wernissage!
PUBLISHED 2025


INTRODUCTION
This blog documents my journey creating the "M64-AARS "STRIKER", a "Halofied" AUG inspired by Wernissage's concept. I'll share some technical details, but I won't dive too deep as there's a lot to cover!

This project allowed me to expand my skills in 3D, combining my passions for game art, weapons, and the Halo universe. Balancing it with a full-time job, I dedicated time to ensure every detail met high standards. Documenting each step refined my skills in modeling, texturing, lighting, and presentation, boosting my confidence and teaching me how to approach future projects more efficiently.
Planning & Setup
1.1 ⬩ Objective
Create a "game-ready" portfolio piece that encapsulates my learnings and experiences, while documenting new challenges to overcome for future creative pursuits.
1.2 ⬩ Project Requirements
Create a believable "hero asset" firearm that captures the sleekness of the AUG with Halo Infinite's design aesthetic and technical fidelity.
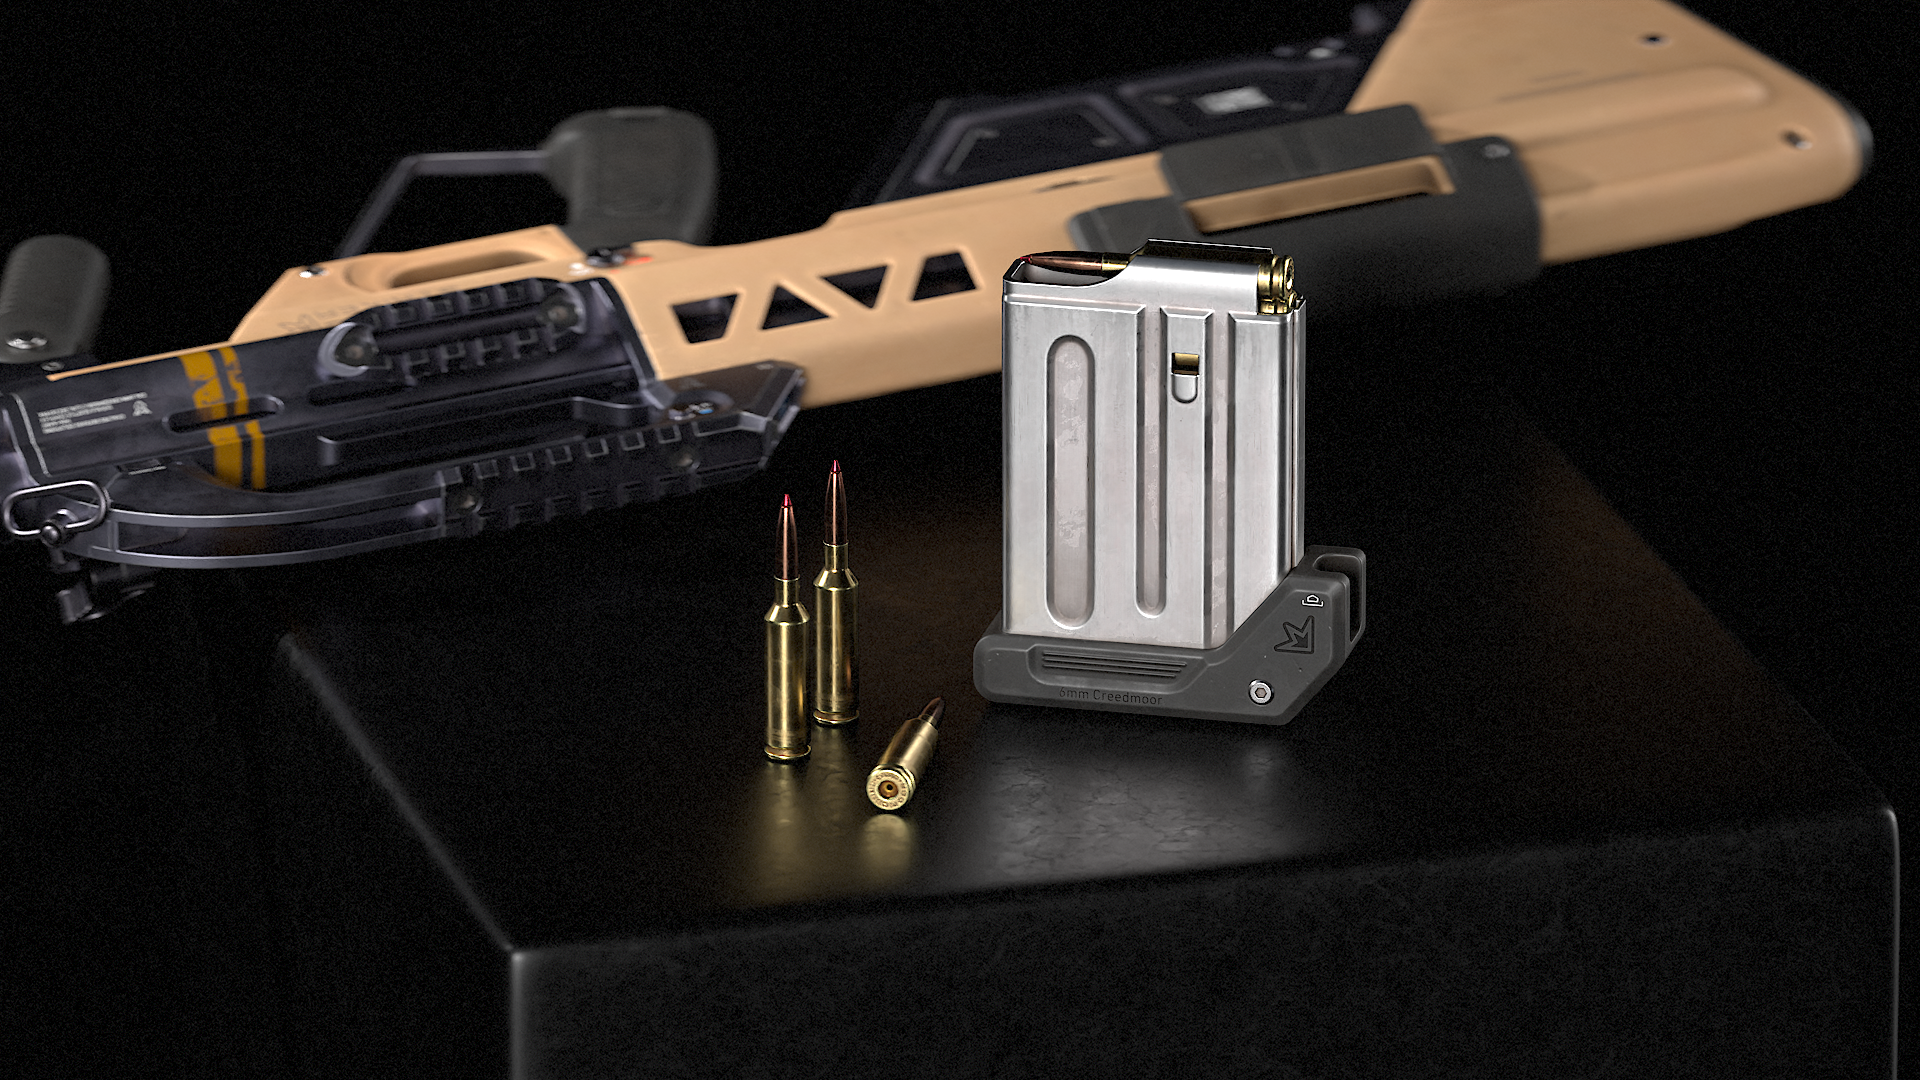
Ensure "close" accuracy by scaling using real-world measurements based on the AUG and 6mm Cartridge.
Decal design elements should be on a separate mesh/UV set to maintain clear image quality even at lower resolutions.
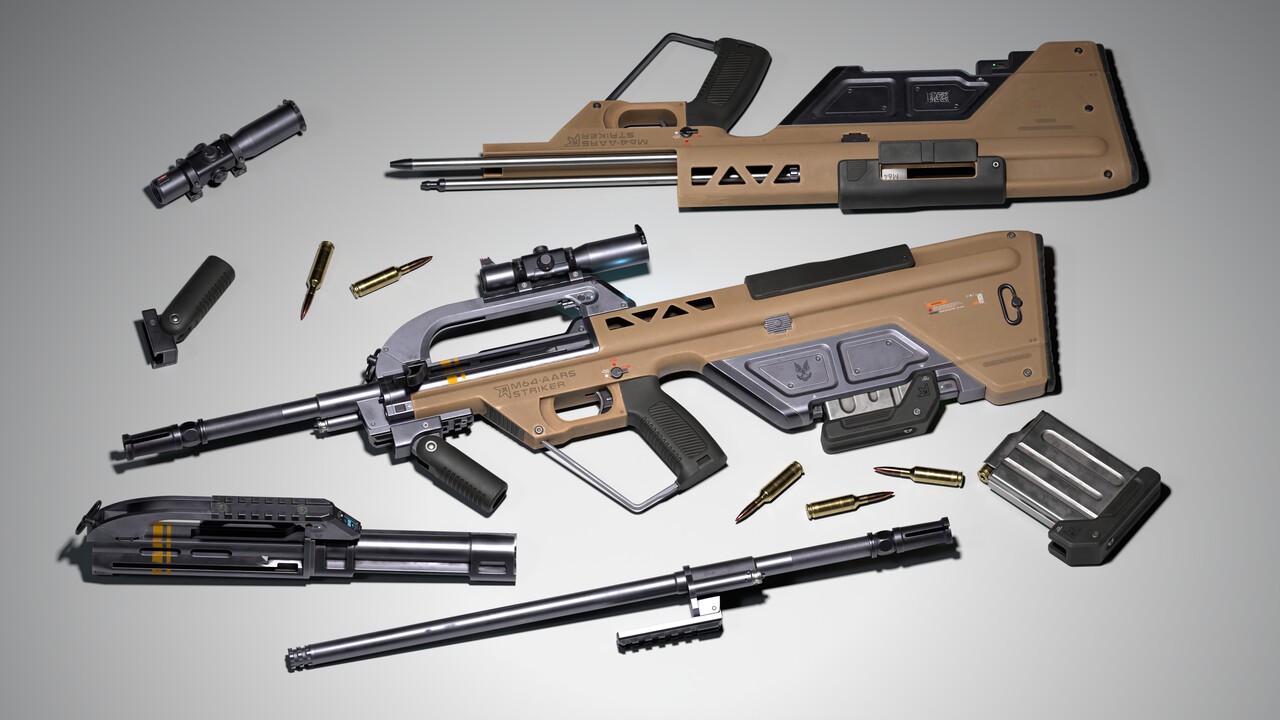
Design the asset to be modular and capable of being disassembled for portfolio render purposes. This modularity allows for future additions like attachments or weapon charms.
1.3 ⬩ Software and Tools Used
Here's a list of software and tools I've used throughout this process!
Task Management: Trello
Documentation: Notion
Version Control: GitHub LFS
Modeling: Maya, ZBrush
UV Mapping: Headus UV (Unwrap), Rizom UV (Packing)
Texturing: Substance Painter, Figma
Rendering: Marmoset Toolbag
Key Art and Designs: Figma
1.4 ⬩ Measurements
In Maya, I set the project to inches, using real-world measurements of barrels and the AUG as a foundation. While not aiming for ultra-realism, I followed Henning Sanden's 'close enough' philosophy from his Anatomy course, which has been freeing in the creative process :)
1.5 ⬩ References
I initially drew an overlay over Wernissage's concept which blends inspiration from the AUG A1, AUG A3, F90, F2000, and some HALO firearm designs [from Bungie's Halo 3, Reach, and 343 Industries' Halo Infinite].
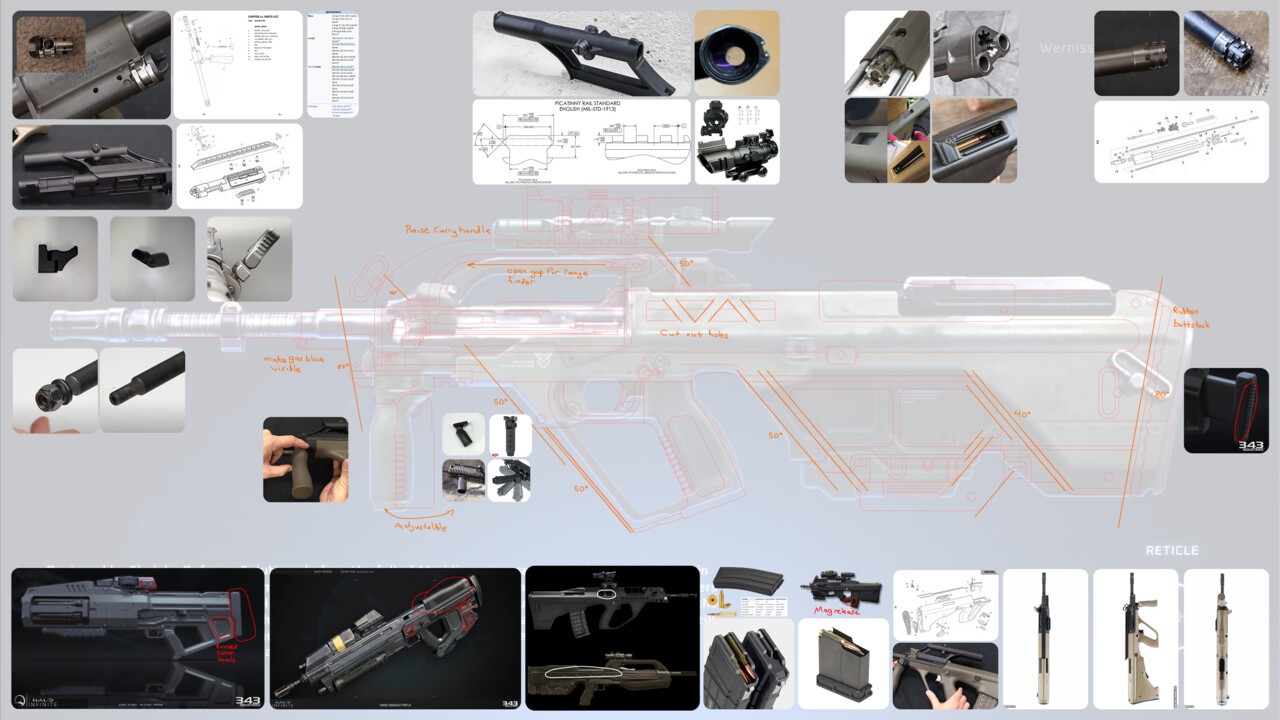
I also observed that games like Halo Infinite and Destiny 2 often use separate meshes for logos and decals, which I noted for the modeling stage. This approach seems to offer flexibility for swapping logos and maintaining image quality when downsizing texture resolution.
High Poly
2.1 ⬩ Initial Measurements and Blocking
It all starts with the cartridge and the barrel, two key parts of the gun that I wanted to scale accurately to establish the overall proportions.
According to the reference, the gun uses 6mm Creedmoor cartridges, so I followed these steps:
Use Real-world measurements of the cartridge.
Overall 2.8" length
Diameter of 0.473".
In Maya: Used cylinder primitive.
Set subdivision axis to 32
Set length to 2.8
Set radius to 0.236 (diameter ÷ 2)
Casing and Bullet Proportions
Used an image overlay to block the parts by eye.
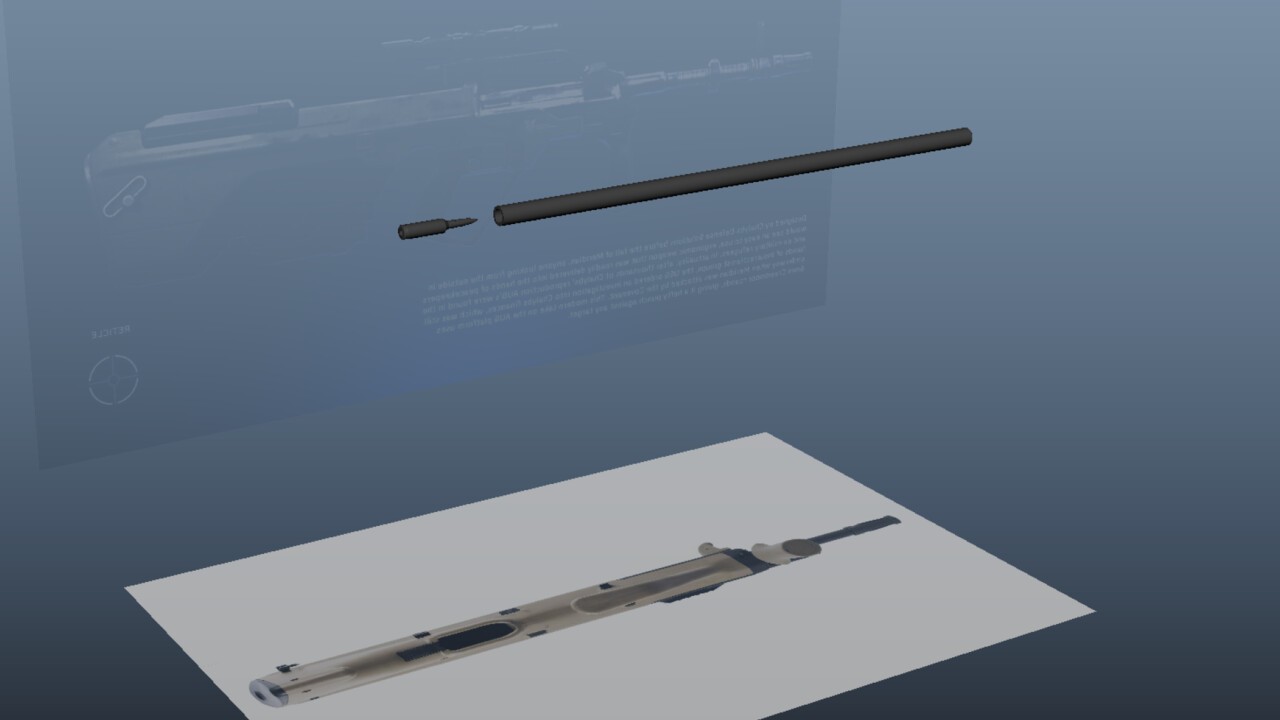
Once the cartridge was complete, I applied the same process to the barrel. With the barrel block out, it became my basic "unit of measurement" for blocking out all other parts of the gun.
2.2 ⬩ Boolean Modeling in Zbrush
Once the general block out of all pieces needed are complete, I'll then transfer everything over to Zbrush. From there, I'll do a back and forth process of cutting or adding shapes to the basic forms using Zbrush's powerful Boolean capabilities!
I picked up this interesting high poly modeling technique through Florian Neumann's Game Resolution Shotgun SR-410 and Eugene Petrov's Springfield XD Mod2 tutorials. [Quick shoutout to them for the amazing knowledge share!] This Boolean workflow is generally non-destructive and allows for quick iteration with fairly solid end results.
2.3 ⬩ "Make Boolean Mesh" and Detailing
With the high poly Boolean complete for all parts, the next steps are as follows:
Under Boolean, we will select "Make Boolean Mesh" to combine all Boolean operations.
Apply Dynamesh to each part
Apply crisp edges to achieve soft bevels around hard corners.
When using dynamesh, it’s important to set resolution parameters for each part as a rule of thumb. This will maintain file size as much as possible and avoid potential performance issues on Zbrush!
Large parts ~ Max 4096 resolution
Mid-sized parts ~ Between 2048 and 1024
Small parts ~ Below 1024, down to 400
To ensure consistency, I created a chart in my Notion document to track the dynamesh resolution and crisp edge values for each piece. This makes it easy to revisit and adjust any part of the Boolean-to-dynamesh process if needed.
2.4 ⬩ Dynamesh Limitations / Using Floater Geometry
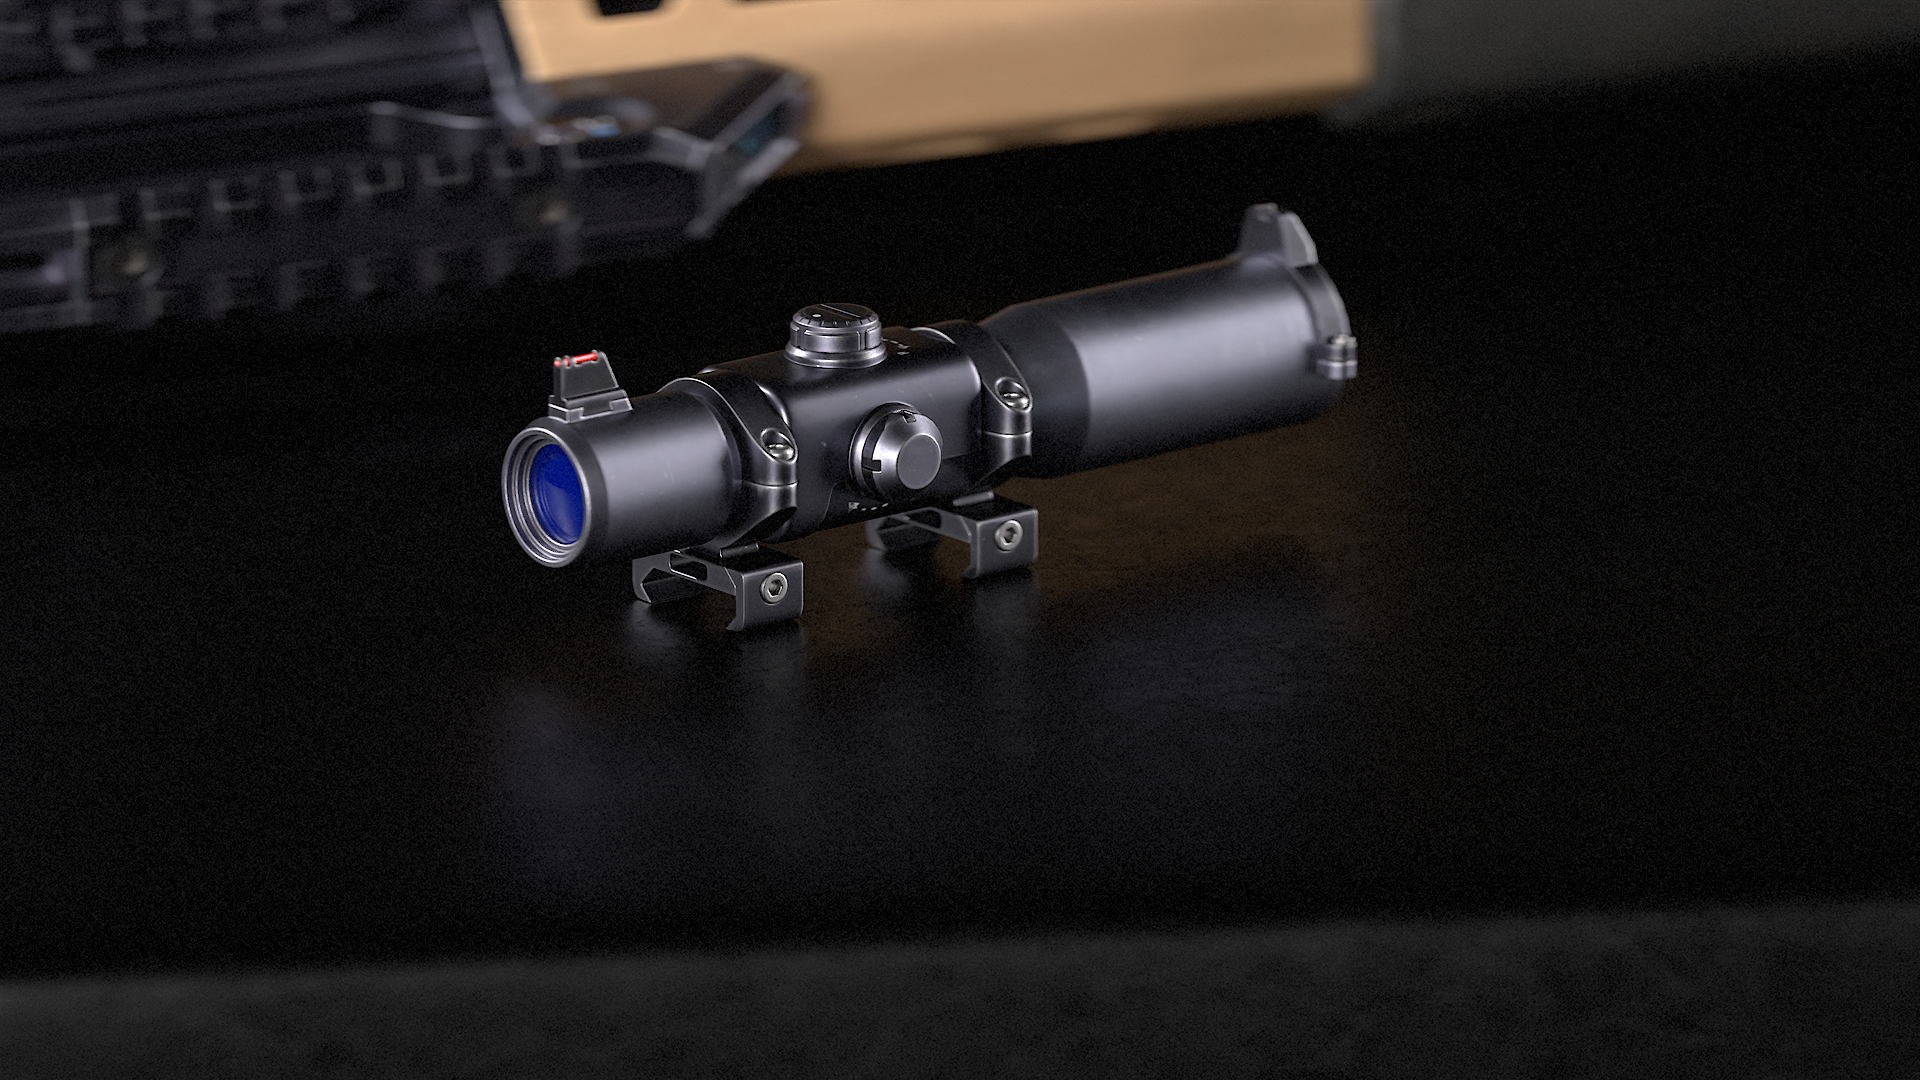
One limitation of Boolean modeling is capturing smaller details, such as screws on the scope turrets. I was getting errors with smaller meshes so to address this, I added floater geometry in Maya for these details.
These floaters will be baked onto the low poly model later in the process. The added benefit of having floater geometry is that they save time versus adding Boolean details into Zbrush and you can place them anywhere at anytime!
Low Poly
3.1 ⬩ Low Poly Retopology in Maya
This is where the fun begins (technically all parts are fun) — re-topologizing the high poly model into a low poly version optimized for real-time rendering. I followed this procedure:
Imported Boolean shapes created in ZBrush into Maya.
Used Boolean operations in Maya to reconstruct the low poly mesh, ensuring it closely matches the high poly silhouette.
Applied hard edges to areas between two adjacent faces greater than 90-100 degrees, which will help out in the UV cutout process.
3.2 ⬩ Tri Count and Part Separation
Although this is a portfolio piece, I wanted to stay within a reasonable triangle count range for modern FPS view models. Based on research from games like Call of Duty: Modern Warfare (2019+) and Halo Infinite, the "Assault Rifle" category of view models typically range between 30K and 70K tris. With that in mind, I aimed for under 50K tris and achieved the following results:
'Stock' (without attachments) = 33.5K tris
Scope = 5.8k Tris
Foregrip = 2K Tris
Total Combined = 41.4K Tris
To optimize the model:
I reduced polygons in less visible areas.
Increased polygon density in parts that might appear in close-up renders or from a first-person perspective.
UV Mapping
4.1 ⬩ UV Cutting Process
With the hard edges we applied to all meshes in the previous phase, we'll repeat the following for all UV islands:
Ensure mesh to be UV cut has the proper hard edge application
Select hard edges only
Execute UV Cut Action
Execute Unwrap Action
Execute Layout Action (to layout all the cut shells to show everything visible within the set)
Send unwrapped shells to Headus UV maya plugin to unwrap.
Repeat
4.2 ⬩ Mesh Optimization
I’ll also delete duplicate faces in areas that may not require unique texturing (e.g., mirrored surfaces). This is to save on UV set space for the packing process! In the GIF below, the faces in red are duplicated shells.
4.3 ⬩ UV Set Planning
Since this gun was going to have detachable parts such as the scope and foregrip, I divided it into several parts):
Upper (receiver, bolt carrier, carry handle, barrel)
Lower (stock, foregrip, cheek pad, magazine)
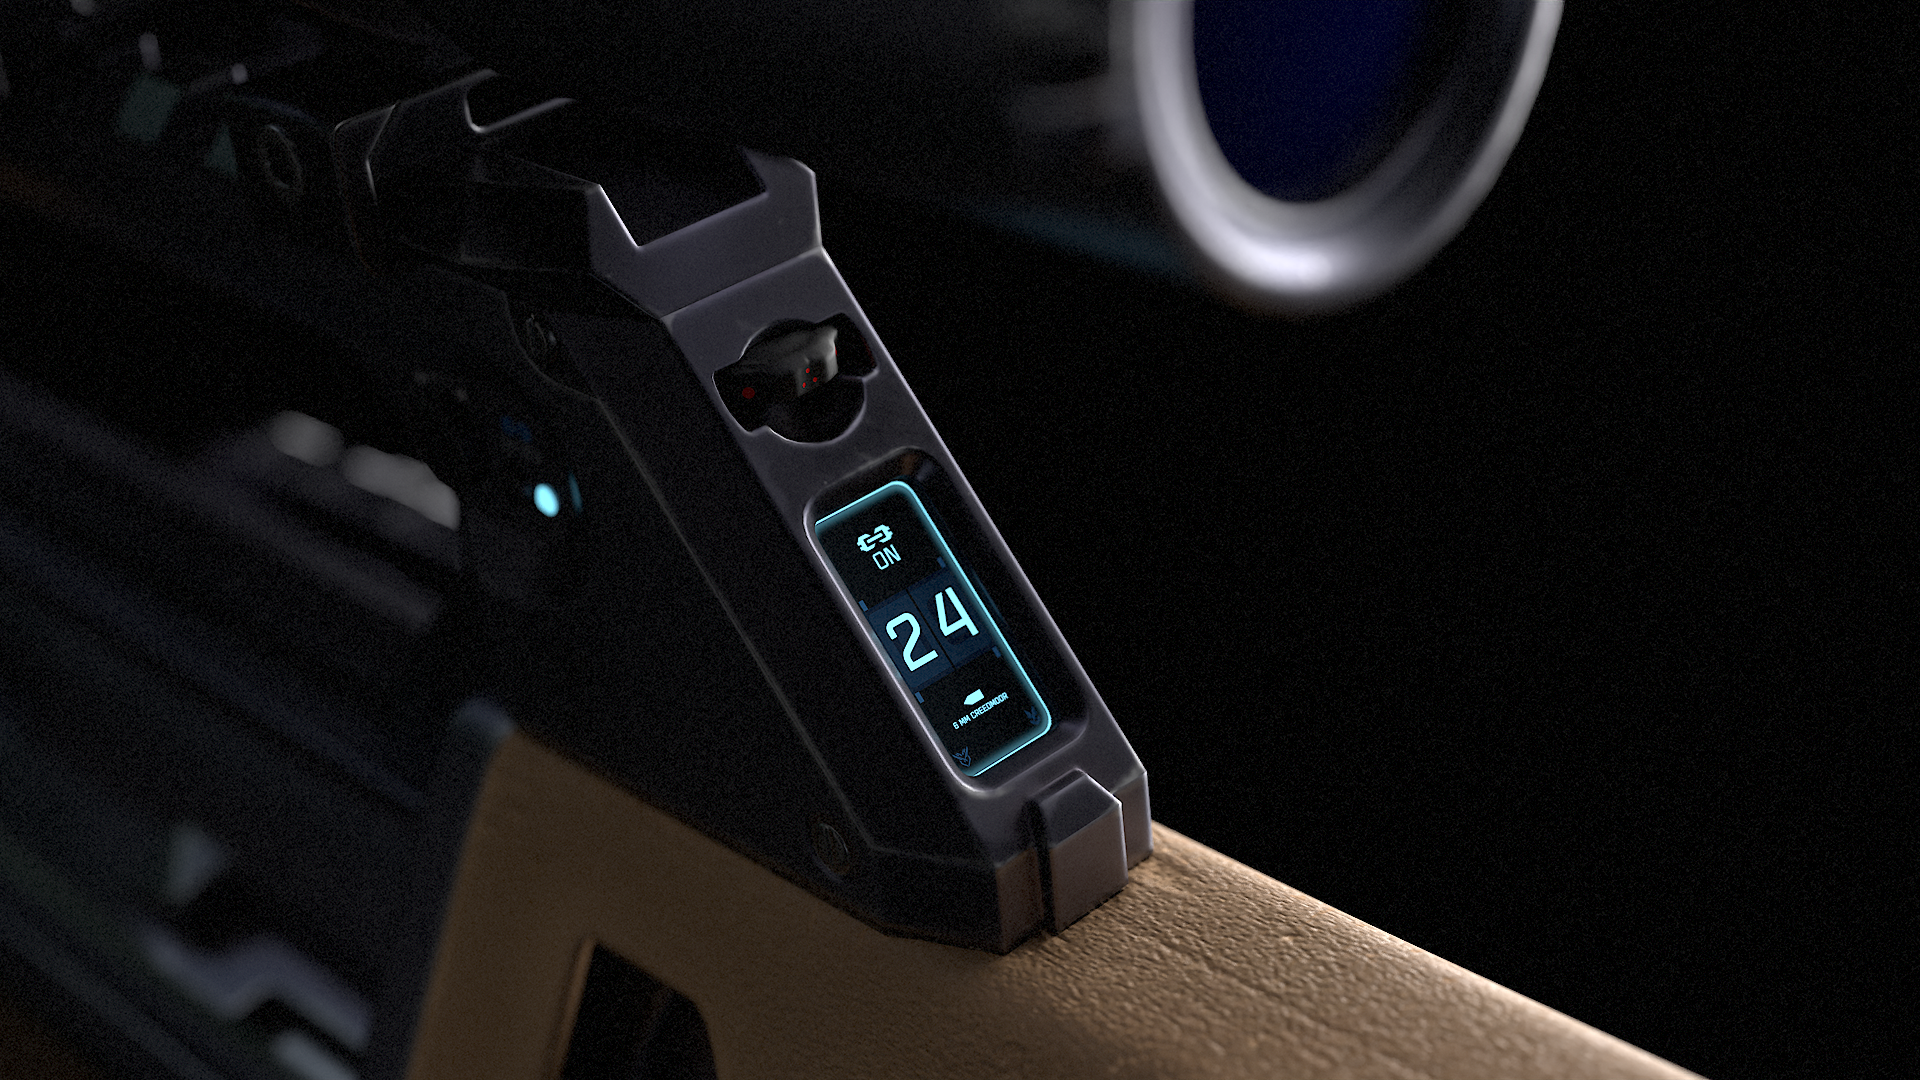
Ammo Counter
Decals (labels/stickers, concave/convex elements)
Foregrip
Scope
I wanted the Upper, Lower, ammo counter, and decal parts be the "default stock" of the gun while the foregrip, and scope will be it's own thing should I decide to update their textures, replace entirely with new attachments, or create new additions to the gun in the future.
After all the UVs were done, I used Rizom UV for efficient packing! As mentioned in 3.2, all UVs will be packed based on the part association (upper, lower, etc.)
Baking
With the UVs complete, I utilized Marmoset Toolbag 5 for baking high poly details onto the low poly mesh. Marmoset Toolbag played a significant role in sparking my interest in 3D, thanks to its impressive real-time rendering, intuitive lighting setup, and baking! We'll see the render portion in a later section.
Texturing
6.1 ⬩ Figma for Asset Creation
I leveraged Figma’s layout tools to create alphas, icons, and designs efficiently. While unconventional for game art, Figma’s ability to create reusable "components" proved invaluable for quick asset creation. In Figma we can essentially create "components" that can be re-used to create new designs 🤩
6.2 ⬩ Substance Painter Preparation
Before importing the model into Substance Painter, I prepared both a combined version and a "blown-up" version of the gun within a large bounding box. The exploded view allowed for detailed texturing of individual parts.
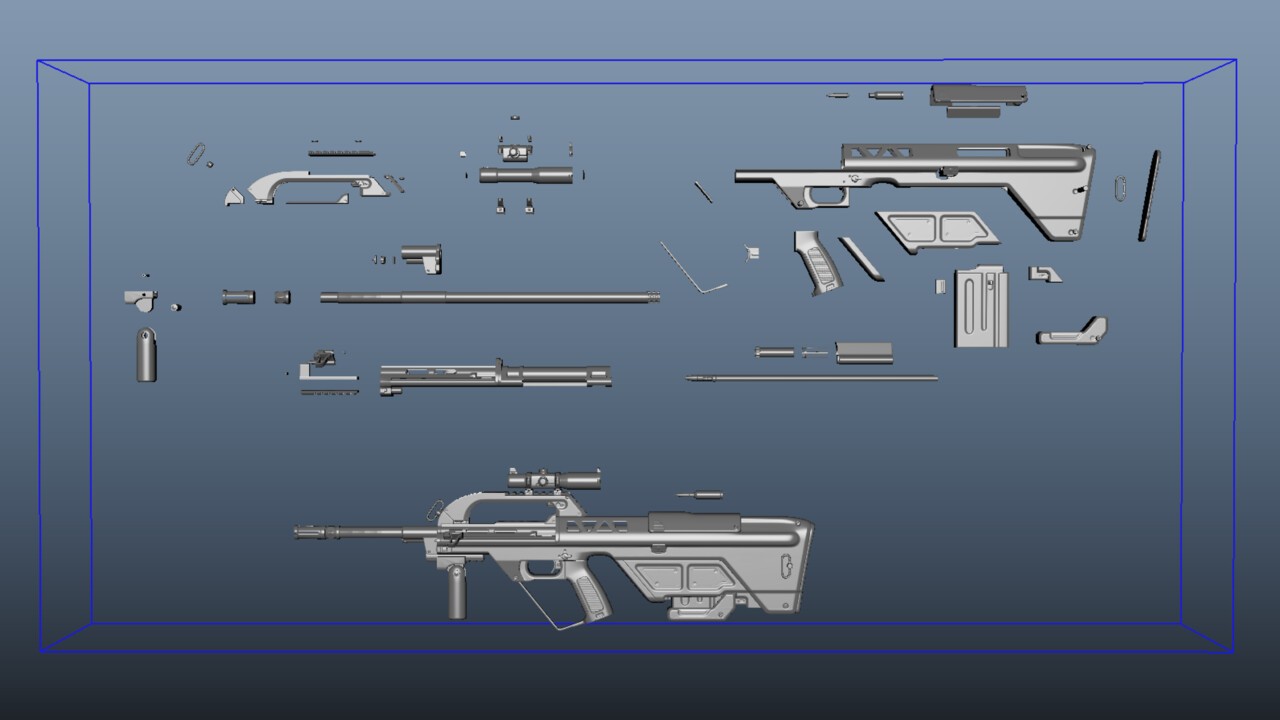
Using the bounding box ensured symmetry in Substance Painter without needing manual adjustments to offset floating parts—a simple yet effective workaround.
6.3 ⬩ Material Breakdown and Inspiration
At this phase, I want to create distinct materials across all UV sets. I decided the gun will have Metal, Plastic, and Rubber.
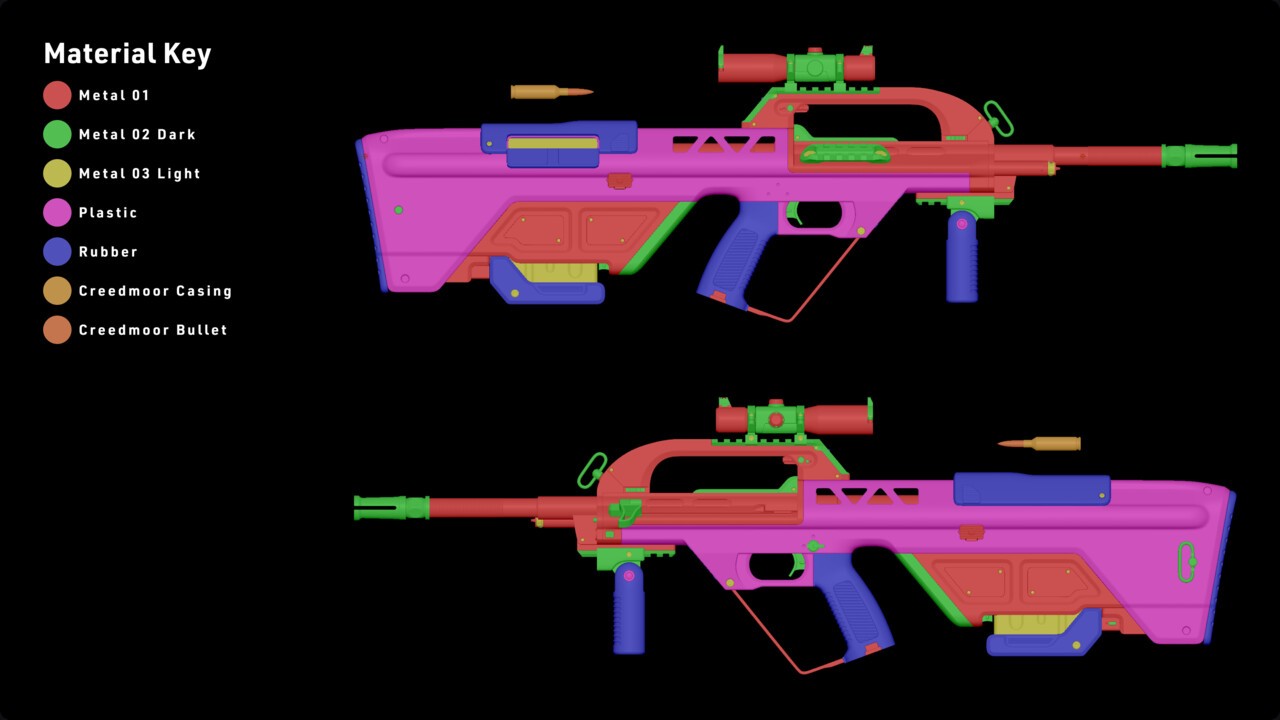
6.4 ⬩ Texturing Layers
Each material will have at least 3 passes as follows:
Color/Material Block Out
Doing a general color block out for each part and editing the level of roughness and/or metal-ness.
Base Materials
Using Mask Generators and Smart Materials.
If necessary, I'll go in by hand to remove details from certain parts or to break up edge wear.
Hand-made Details
Adding finer details like surface scratches, dust, smudges, and micro particles via alpha Brushes.
If necessary, I'll balance out the details between the base material and hand-made details.
6.5 ⬩ Texturing Mindset
While texturing, I do want to be mindful of the following rules to follow:
Have a judicious use of procedural edge wear. Don't overdo the edge wear and ensure it's broken up!
Be strategic with the placement of scratches, wear, and dirt in logical areas.
Rendering
I went back to Marmoset Toolbag to render the gun at different angles and lighting setups! The following below are typical lights I will generally mix and match depending on the scene:
Rim Light - Positioned behind the subject to create a light rim and enhance the silhouette. This helps separate the subject from the background.
Key Light - The primary and most important light source, placed at an angle to define the subject's form and shadows.
Fill Light - A secondary light used to subtly illuminate areas that need more light, reducing harsh shadows without overpowering the key light.
Overhead Light - Optional, but I often use a soft overhead light to complement the fill light and add subtle highlights on the top of the subject. Sometimes this light isn't noticeable when paired with other lights so I only use it wherever necessary.
I also found a great article written by Emre Karabacak on Marmoset's website for lighting and rendering guns too!
In addition, here's some renders that didn't make the cut in the final version. I liked these visuals a lot but I chose to use a dark background for these renders, inspired by Artstation's black background, to maintain visual consistency and reduce eye strain. Initially, I considered creating a transition from dark to light backgrounds, but I decided to focus on showcasing the project itself.

Reflecting
8.1 ⬩ Software Usage
While ZBrush's Boolean function proved useful for high poly modeling, I'm eager to explore alternative approaches, such as Plasticity, in future projects!
8.2 ⬩ Challenges
A key challenge was deciding whether to organize UV meshes by material or proximity. For instance, I debated adding the stock's metal components to the "Upper" Receiver UV set. Ultimately, I grouped it with the "Lower" mesh, opting to create a consistent base metal material applicable across different parts.
8.3 ⬩ Maybe Next Time?
Although I didn't incorporate rigging or first-person animations in this project, I'm considering these elements for future work.
I did, however, implement a way to control the ammo counter using texture offsets. I managed to piece it together thanks to videos from Steven Ormerwood and Interactive Media High Tech High School! I'm not well versed in rigging but doing this tiny interaction point made my learning even more fulfilling. I'll come back to this at a later time :)
8.5 ⬩ Conclusion
This project has been an exciting opportunity to enhance my skills in creating game-ready assets. I'm eager to apply these techniques to future projects!
Thank You to those who've inspired me throughout the course of this project - Wernissage, Eugene Petrov, Florian Neumann, Bungie, Halo Studios, Henning Sanden, Steven Ormerwood, Interactive Media High Tech High School, Eepums, Khayeet, Fontan, Paktric, internet friends, and loved ones.
MARMOSET
POLYCOUNT
'Stock' (without attachments): 33.5K ▲
Scope: 5.8K ▲
Foregrip: 2K ▲
Total Combined: 41.4K ▲
Texture Map Usage
Still Renders: 4K Texture Maps
Marmoset Viewer Model: Stock uses 2K textures while attachments use 1K textures
CRAFTED BY DAIDACKT | BRIAN L.